
Set up your menu, start to finish
Menus, Media, Links page & QR and Brand, and the order to work through them.
Your menu is what customers scan and what your AI waiter reads. Everything about it lives under Menu in the sidebar, in four pages: Menus, Media, Links page & QR and Brand.
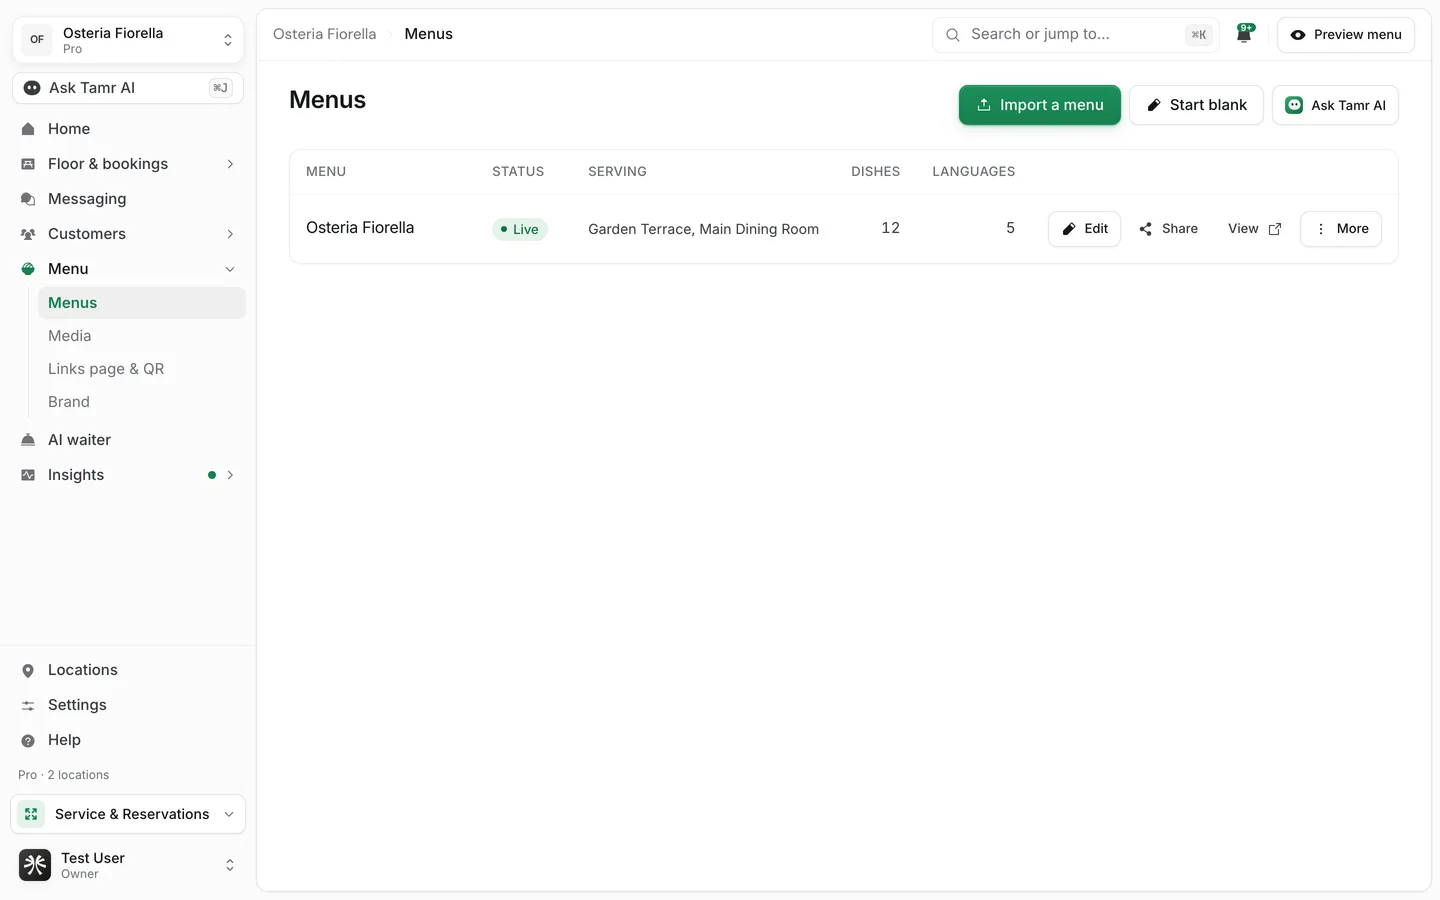
The four pages under Menu
MenuspageMediapageLinks page & QRpageBrandpageWork through it in this order
- 1Set your brand
Open Brand and add your logo, main colour and background. Your menus and Links page pick it up straight away. This is also the first step of the Kickoff.
- 2Bring your menu in
On Menus, select Import a menu and paste a link, or upload a PDF, photos or a spreadsheet, or start from scratch. See import a menu →.
- 3Complete the dishes
Check prices, then add descriptions, photos, dietary tags and allergens. The Tamr AI menu shows what is missing and drafts much of it for you to review. See edit dishes →.
- 4Design the menu
Pick a layout, a cover and a subtitle on the Design tab, and the languages and price format under Settings. See design and settings →.
- 5Publish and share
Select Publish, choose the locations that serve the menu, then print your codes from Links page & QR.
The menu editor
Open a menu to get its editor. The tabs along the top are Dishes, Design, AI waiter, Add-ons and Settings. The green Share button beside the menu's name opens its QR code and address, and the Tamr AI button holds the AI helpers for the whole menu. A live phone preview on the right repaints as you edit.
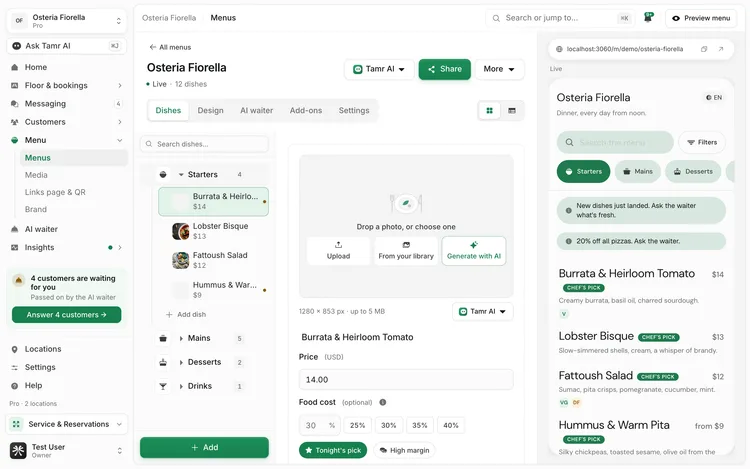
DishestabDesigntabAI waitertabAdd-onstabSettingstabMenu status
A menu is always in one of four states, shown under its name.
| Status | What customers see |
|---|---|
| Draft | Nothing. Only you can see it until you publish. |
| Live | The menu. Edits reach customers in seconds. |
| Offline | A not-found page. The menu was live and was taken offline, so printed codes lead nowhere until you publish again. |
| Archived | Nothing. Hidden from customers until you restore it. |
Owners and admins can import, edit and publish menus. Other team members can view them.
FAQ
Can I run more than one menu?
Yes. A brunch menu and a dinner menu, or a menu per brand, each live under Menus with their own dishes, design and locations.
Do I need the AI waiter before I publish?
No. A menu works on its own. With no waiter attached, chat is off on that menu. You choose who answers on the menu's AI waiter tab.
Where did the Share tab go?
It is the green Share button beside the menu's name. It opens the menu's QR code, its address and its tracked links.
Related
Last reviewed October 14, 2026